How To Delete Any WP User (And Keep The Content)
Whether we want to delete the admin user – or ANY user – WordPress gives us a lot of flexibility and makes it really easy!
Removing the “admin” user account, that is auto-created by many quick installers, is one of the first things WP users can do to increase their site security.
Removing it does not stop us from having a user with administrative privileges – but it DOES stop a hacker from immediately guessing our username!
This post may look a little long, due to me using a lot of screenshots, but the steps to remove the WordPress admin user, are actually really simple. (I just wanted to be sure the process was super clear!)
Steps To Delete the WordPress Admin User
1. Update Admin’s Email Address
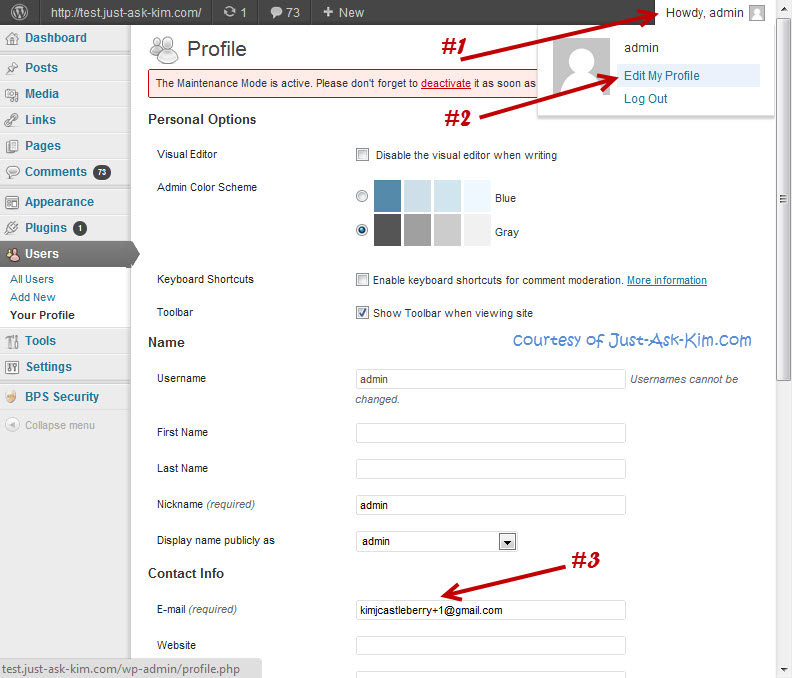
First, we need to be signed in as the admin user and give the admin user an email address that is not the one we plan to keep. Two users can not have the same email, so we quickly set this “old” user to a fictitious address.
Be sure you are signed in as the admin user, then in the upper right corner, hover over the words “Howdy, admin” and in the drop-down select “Edit My Profile”. In the profile section you can enter a different email address and then click save/update.
(You can either use a totally fake email address or if you are a gmail user like me, add a +1 to the first half of your email address, to create a alternate email address that actually still goes to your real inbox.)
2. Create A New WordPress User
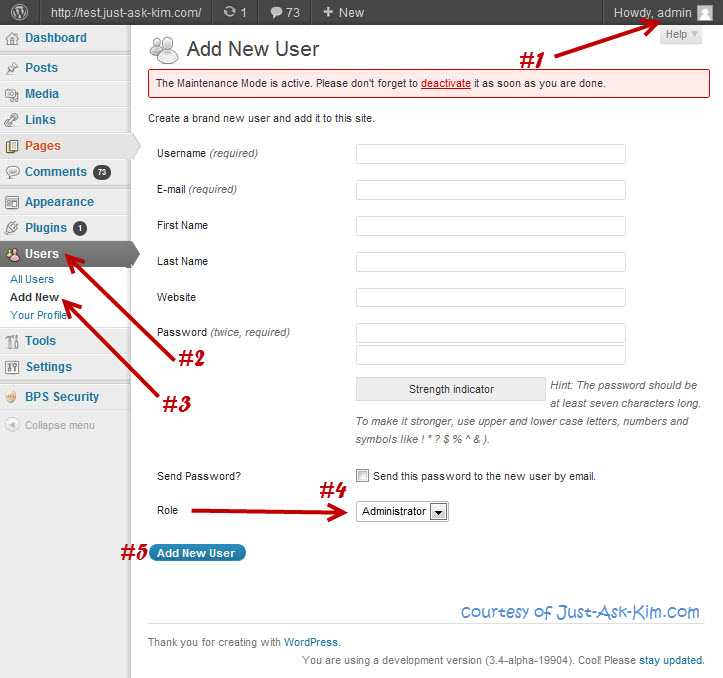
While still signed in as admin, we want to make a new user using our preferred username, password, and gravatar email address and set the “role” to say “administrator” in the drop-down box.
This is a good time to ensure you are using a secure password that you do not use on any of your logins.
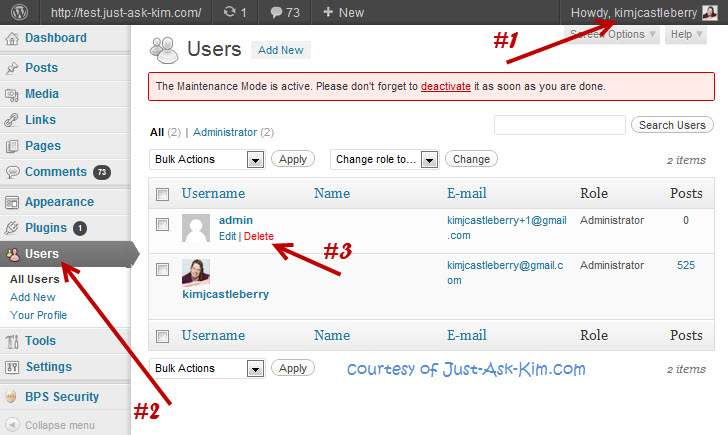
3. Now, log out of admin and log back in as your new user.
4. Go to “All Users” and hover over “admin” and select the “delete” options
5. Delete The Admin User
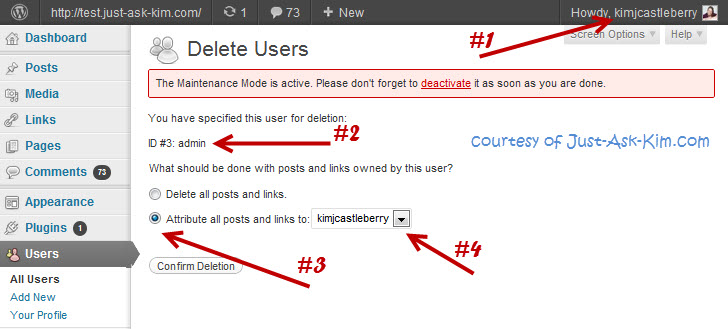
On the delete user page, we need to take great care to ensure these settings are correct.
The listed user that we are deleting needs to say “admin” (next to the #2 arrow)
The check box (next to the #3 arrow) needs to be moved down to “Attribue all posts and links to….”
and the drop down for attribution (next to the #4 arrow) needs to show the username of our new user.
What we are doing here is not only deleting the admin user but making sure that all of the posts, pages, etc that belonged to that user are not sent to the trashcan!
(If you accidently forget to move the box to attribute…. you will usually find most of the deleted posts in the “trash” section of posts and pages.)
And that’s all folks…. no more crummy admin user!
This really is a very easy process and it’s a great first step in learning to “harden” (improve the security of) WordPress. While it is only one of many steps that can be taken, its easy enough for anyone to do!
Fortunately, since WordPress 3.0, most auto-installers no longer create a default admin user and instead prompt you to create a user name for yourself… this was a great step forward for the baseline security of WordPress!
Hope you enjoyed this tip!
Now go do it! And then of course come back and leave me a comment! ;)
image source: WordPress & me


