Maintaining a clean database is crucial in this day and age, and there are several HubSpot best practices you can follow to ensure your CRM is constantly up to date and reports on accurate metrics.Ensuring data cleanliness equips your marketing and sales teams with accurate and complete data, resulting in their ability to provide helpful and targeted information to potential customers. Even further, it allows you to report on relevant information that tells a true, accurate story.
The buyer’s journey is constantly evolving, and as consumers ourselves, we know our decisions sway depending on the information we read, the feedback we hear, and the experiences we encounter. As the Greek philosopher Heraclitus once said, “Change is the only constant.”
Lucky for marketers, HubSpot has an array of marketing automation features that allows you to not only keep track of these constant changes, but also to update them in real time. HubSpot also released custom reporting that allows you to capture the information you need in a variety of visuals.
Here are a few of the properties that change most frequently:
- Lifecycle stage
- Lead status
- Lead scoring
When reporting on properties that constantly change, be sure to scan through HubSpot’s thorough report library to see if an existing report provides the data you need. If not, familiarize yourself with HubSpot’s custom report builder to create the visual.
Now, let’s get into how you can ensure the properties are staying up to date and, even more importantly, let’s look at how you can report on them.
Lifecycle Stage
Before we get into tactics on how to keep lifecycle stages up to date, you’ll want to ensure you are using HubSpot’s lifecycle stage property and not a custom “lifecycle stage” property. It’s important to note that this property cannot be customized, and that it has special functionality to ensure lifecycle stages cannot move backward via automation. For instance, you don’t want an Opportunity moving backward to become a Marketing Qualified Lead as a result of a form fill.
There are two ways to ensure lifecycle stages are kept up to date within HubSpot:
- Via a hidden field on a form
- Via a workflow
Via a Hidden Field on a Form
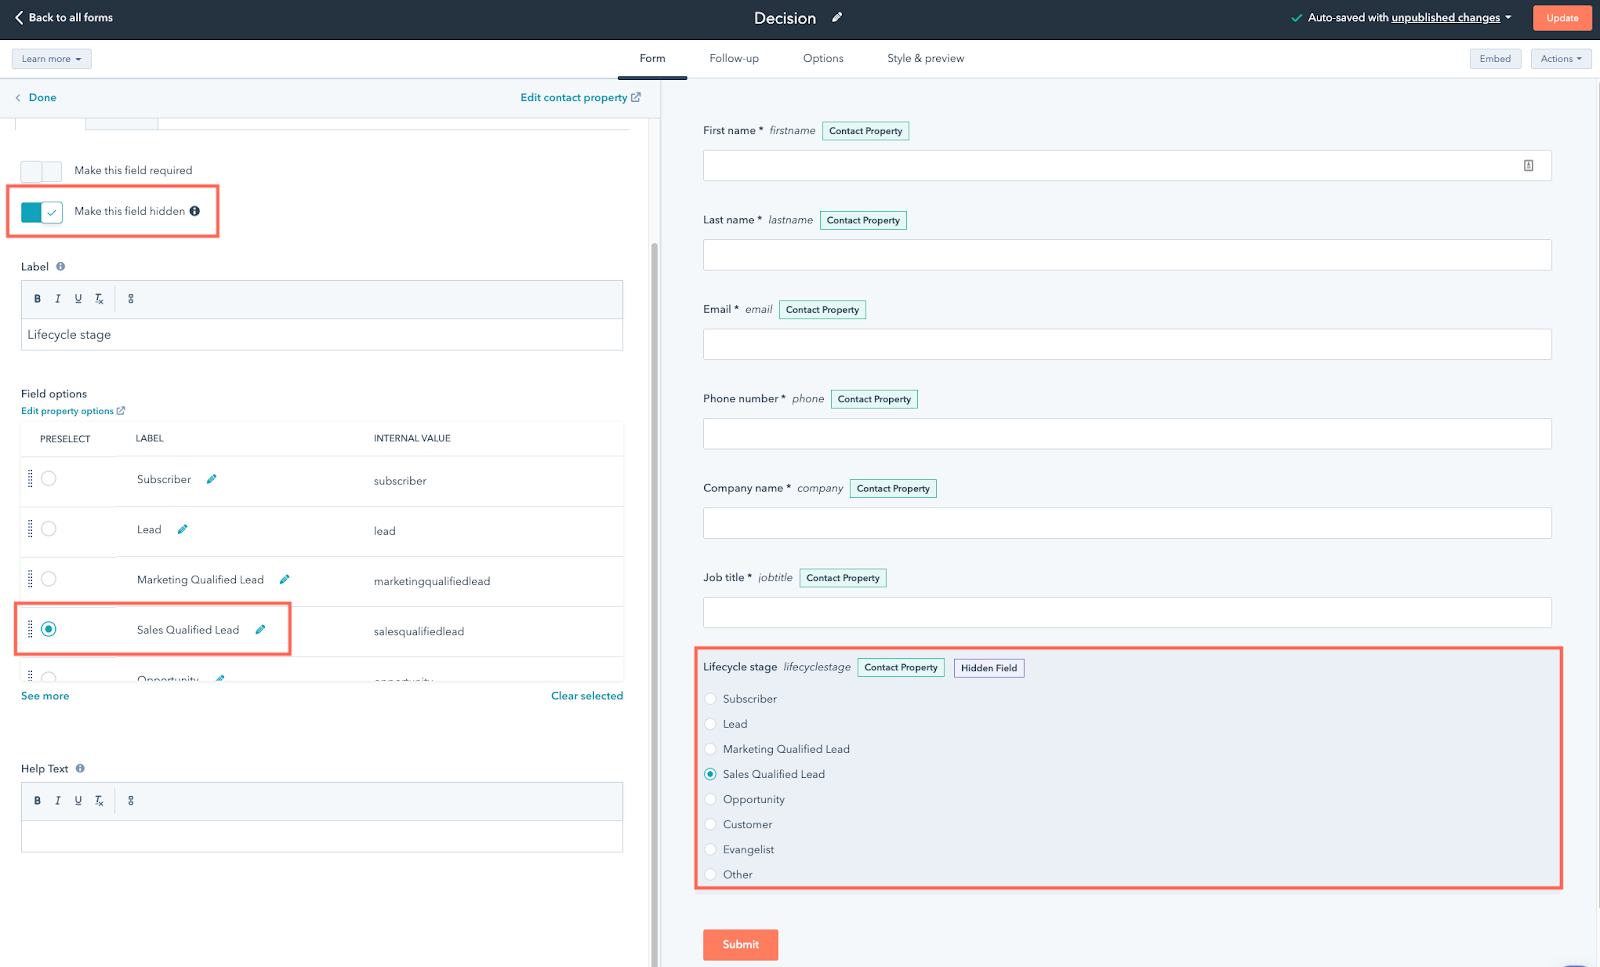
When your forms are segmented based on the buyer’s journey, you can add Lifecycle Stage as a hidden field on the form. You can also preselect a label to attach that stage to the contact record when they complete the form.
In the example below, we added Lifecycle Stage as a hidden field on our Decision form and preselected Sales Qualified Lead (SQL). This means that anyone who fills out this form on any page will be updated to an SQL. Note that, because we are using HubSpot’s lifecycle stage, if that contact happens to be an Opportunity or a Customer already, they won’t be reverted back.
Via a Workflow
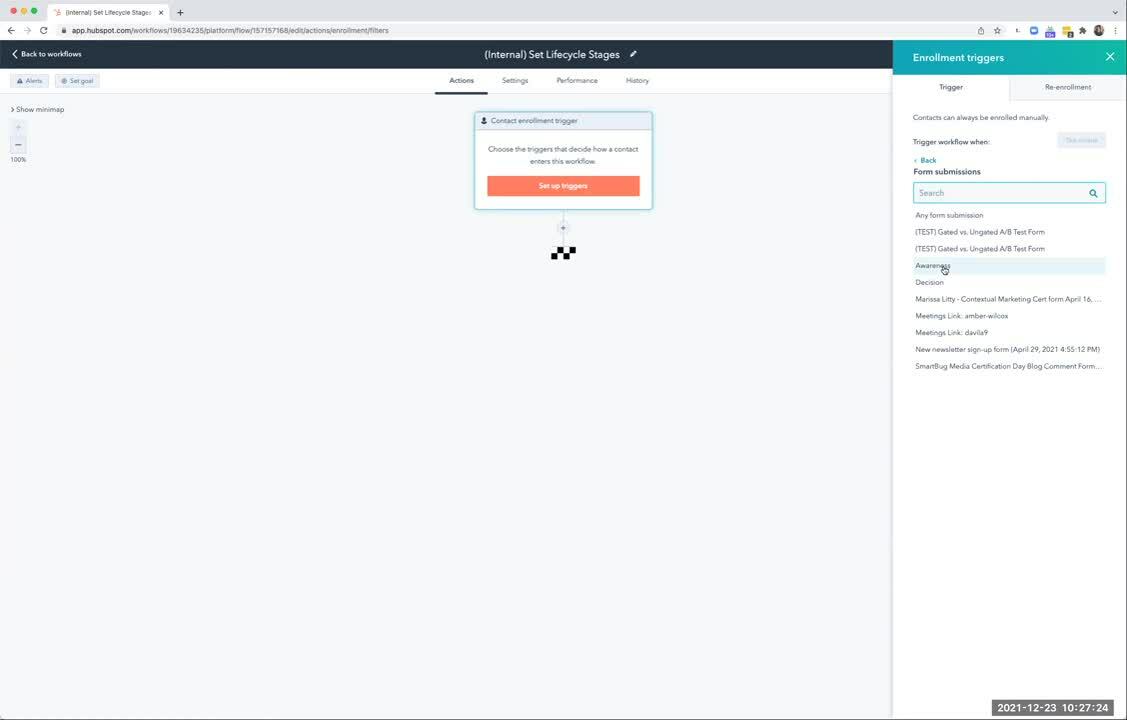
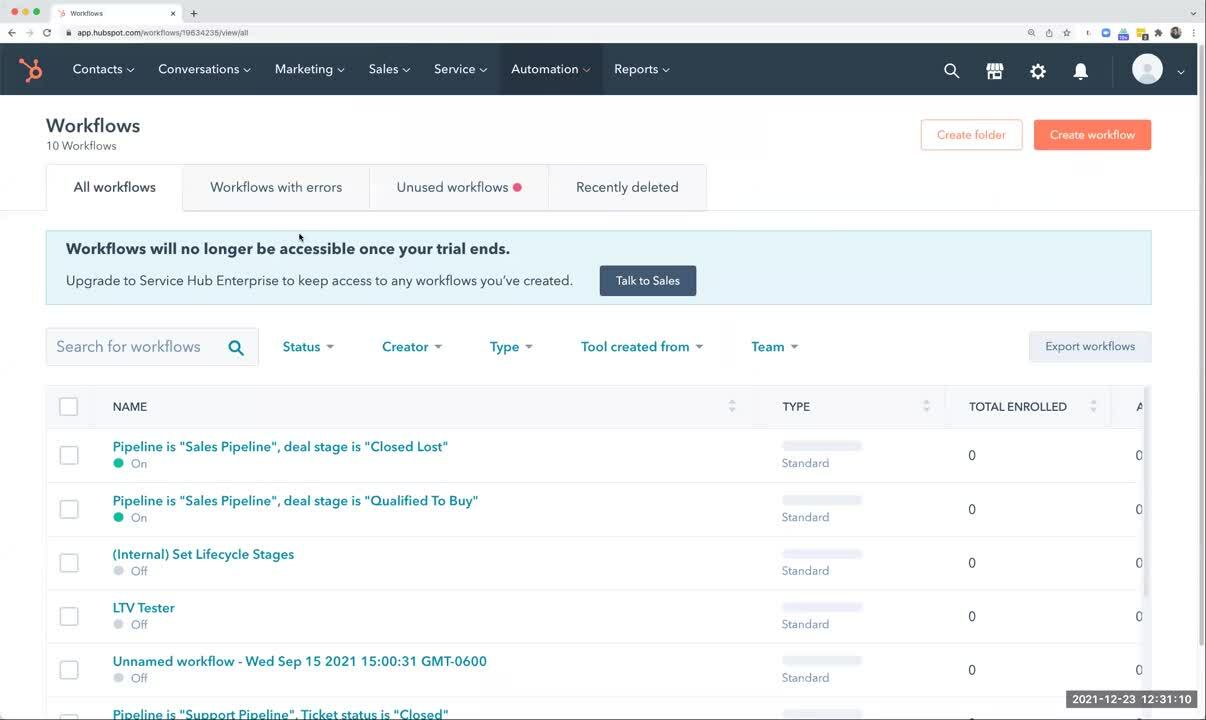
If you prefer not to have hidden fields on your forms, another common way to keep lifecycle stages up to date is via a workflow—this also ensures the property is updated in real time. In the example below, we set up an internal workflow to set contacts to SQLs based on submitting that Decision form.
Pro Tip: “Form submissions” are only one of several criteria you can choose to set lifecycle stages.
HubSpot Best Practices: Reporting on Lifecycle Stages
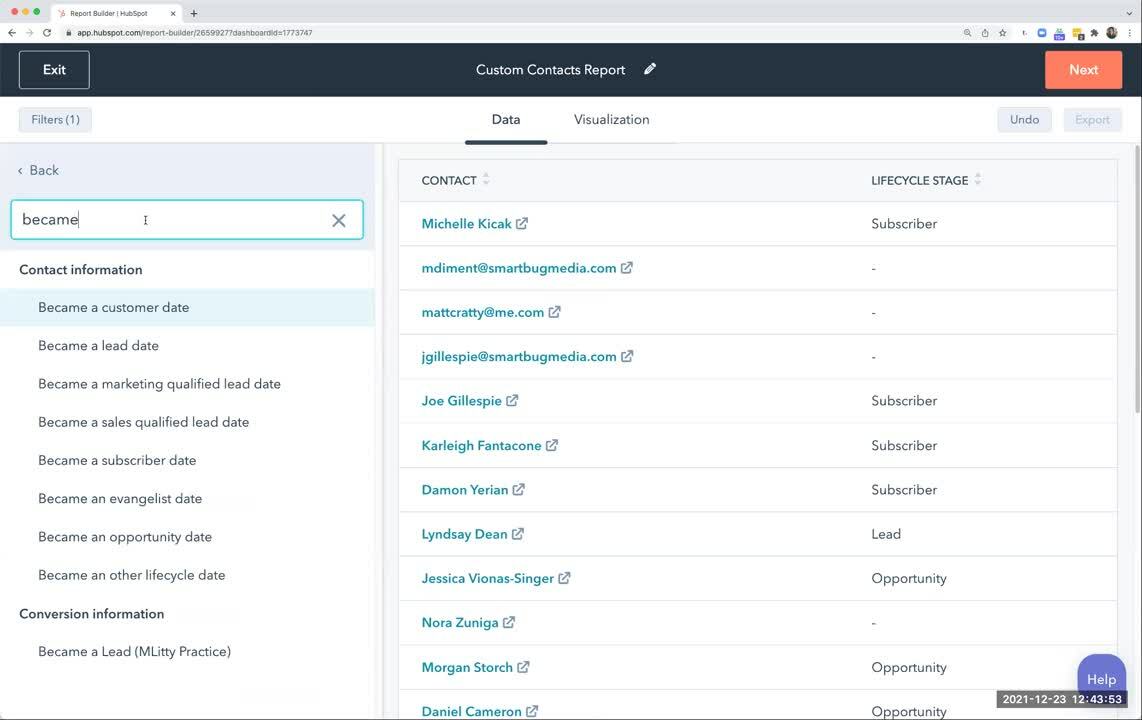
Each lifecycle stage in HubSpot has an accompanying date property that is automatically updated when the lifecycle changes. These properties start with “Became a” and end with the lifecycle stage, plus date (i.e., “Became a marketing qualified lead date”).
When reporting on lifecycle stages, be sure to pull in these date properties to get an accurate picture of net new contacts. For instance, here’s how you’d set up a report to see new marketing qualified leads over the last few months:
Lead Status
The lead status property is one of the most useful properties for sales reps to understand where the prospect is at in the process based on previous activities they’ve completed. HubSpot’s default lead statuses are:
- New
- Open
- In Progress
- Open Deal
- Unqualified
- Attempted to Contact
- Connected
- Bad Timing
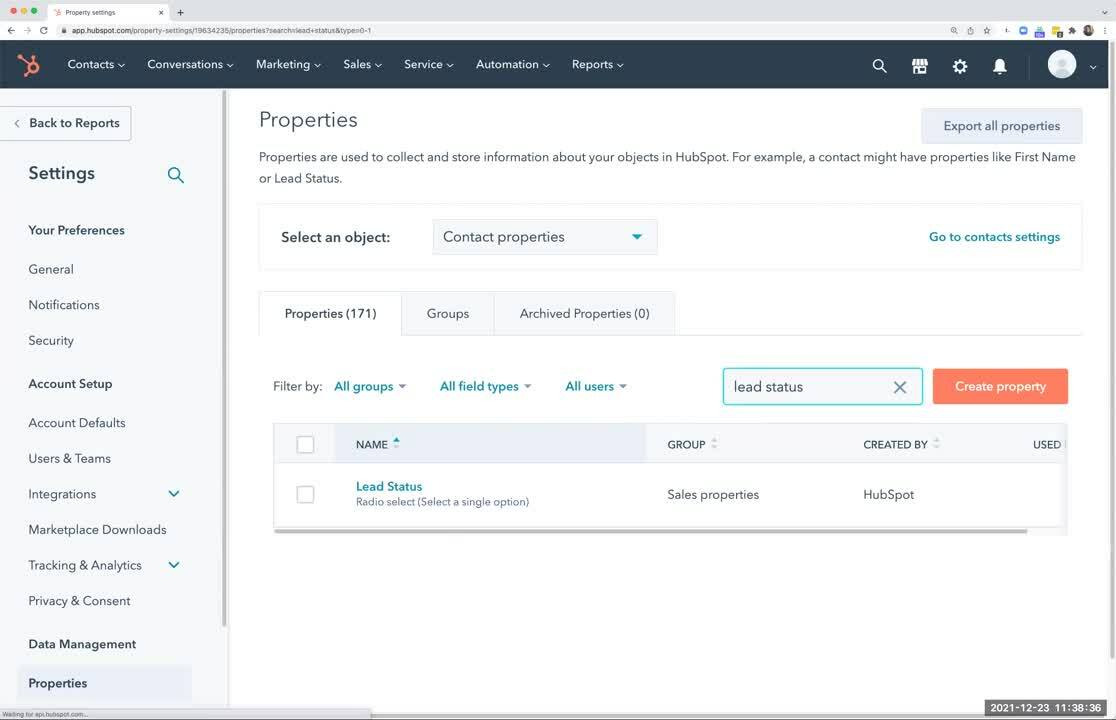
An added feature of this property is that it can be customized, unlike the lifecycle stage property. For instance, if you wanted to add additional status for the reason why a lead is unqualified, you can do so.
There are also multiple ways to ensure lead statuses are updated:
- Via a workflow (see the first video, but “Set Property Value” should be Lead Status)
- Via pipeline automation
Via Pipeline Automation
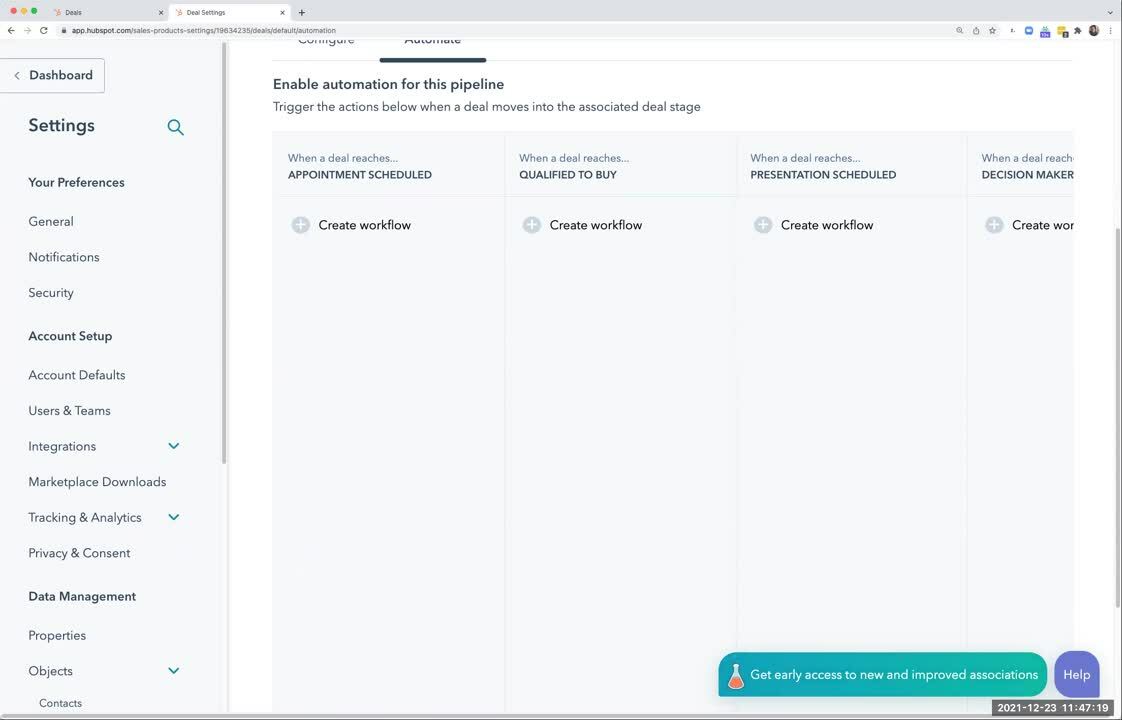
Navigate to your HubSpot Deals. In the upper right-hand corner, select “Board Actions” > “Edit stages.” Select the appropriate pipeline, and navigate to “Automate.” Create separate workflows in the appropriate stages, and set the Lead Status property based on appropriate actions.
Note: This will update the lead status for any contacts associated with the deal.
HubSpot Best Practices: Reporting on Lead Status
Reporting on changing lead statuses is a bit trickier, because there aren’t date properties attached or funnel reports available. The best way to visualize lead statuses is by building a custom report.
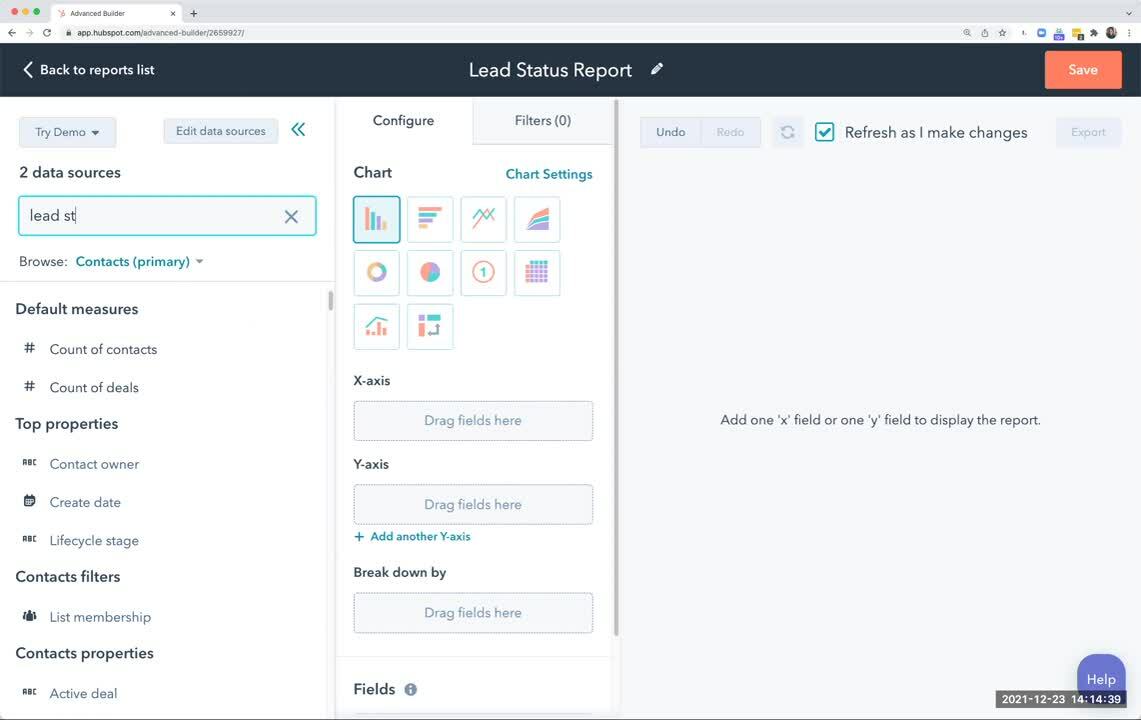
Navigate to the “Custom Report Builder” and select “Contacts” and “Deals” as your data sources. Name your report, and select your data: count of contacts, lead status, create date. Configure your report, and select which type of graph displays the data best. You can also add a filter to only look at net new contacts within the last “X amount of days.”
Note: We suggest adding in “Deals” so you can customize and filter the report by deal data if needed.
Lead Scoring
Lead scoring is another beneficial tool for marketing and sales teams to use as they assess where prospects are in their journey. HubSpot allows you to create custom scoring properties, and it also features its own HubSpot Score property that can be used for this purpose.
This property will update automatically when you add positive and/or negative criteria. It’s important to note that the property will update all contact records in your database in real time. Therefore, when you add a criteria to the HubSpot Score property, contacts in your database will be updated.
You can set a threshold so that when contacts hit a certain score, the sales team is notified to reach out.
HubSpot Best Practices: Reporting on Lead Scoring
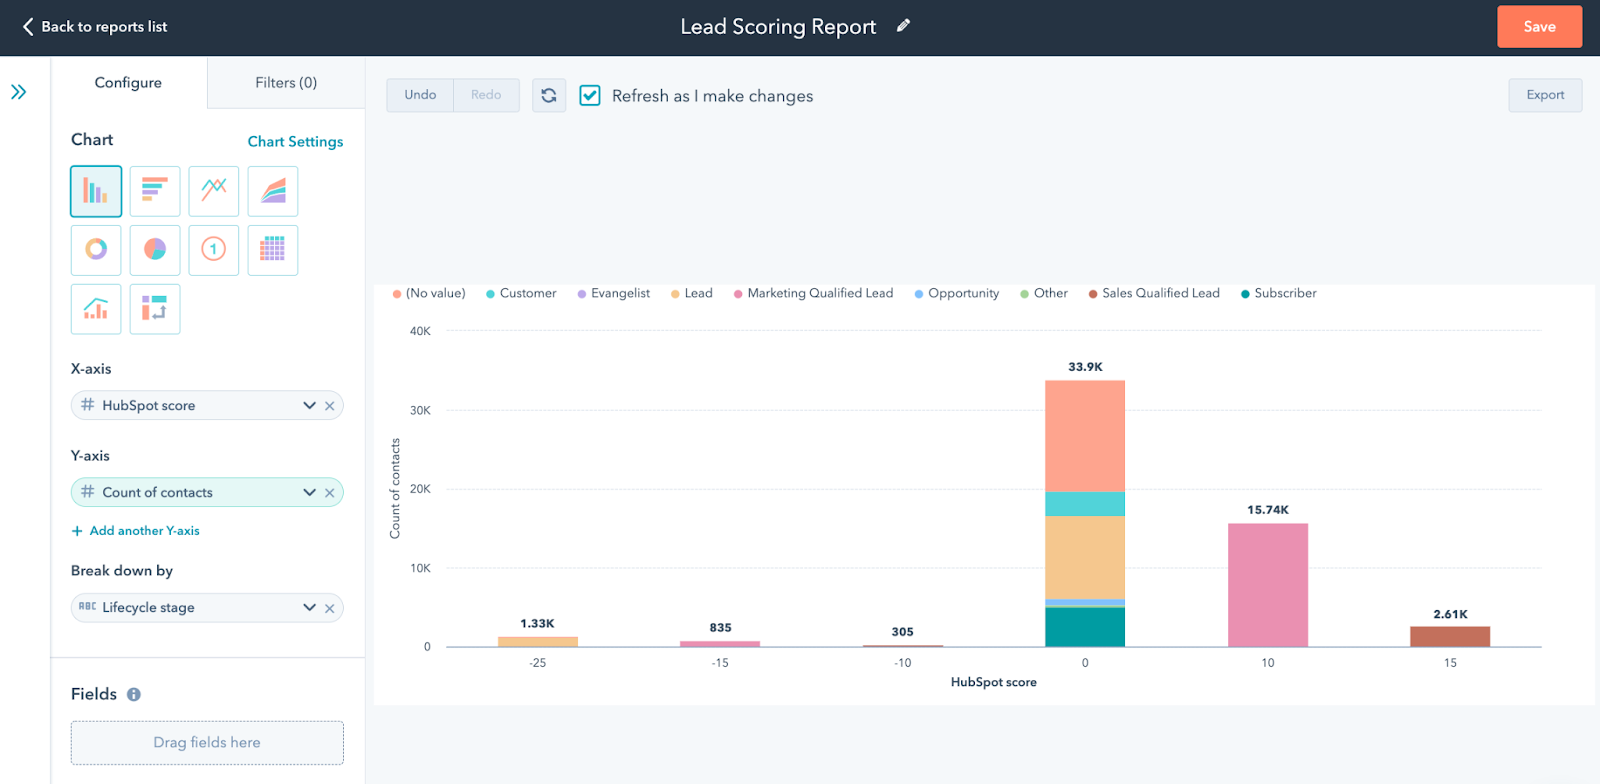
To report on changes in lead scoring, you’ll want to use the custom report builder in HubSpot. Let’s say you want to report on the amount of contacts in your different HubSpot score ranges, broken out by lifecycle stage.
Navigate to the “Custom Report Builder” and select “Contacts” as your data source. Name your report, and select your data: count of contacts, HubSpot score, and lifecycle stage. Configure your report by selecting the vertical bar option. Add HubSpot Score to the x-axis, Count of contacts to the y-axis, and lifecycle stage to the “Break down by” section.
Get Started Visualizing Your Data Stories
By ensuring your properties are up to date, and by utilizing HubSpot’s versatile reporting tool—you can equip your teams with the data they need. In combination with the marketing automation features, these HubSpot best practices will enable your sales and marketing teams to tell an accurate story about how prospects and customers are moving throughout their journey.
