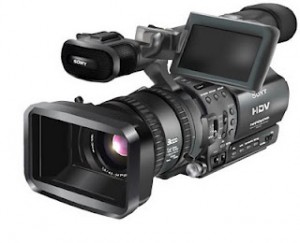
The problem with auto
It is true that having your camera set to automatic has it’s advantages. In some situations, it is the best thing you can do. For example, if you are shooting an observational documentary with one camera and don’t have the time to keep on switching your settings manually. When making corporate videos, the ideal is that you use the manual functions on your camera. Having your camera set to manual will give you control – control which is only useful if you know what you are doing! The main problem with auto is that your camera doesn’t know what you want – this basic fact explains the multitude of problems that can occur (including shots shifting in and out of focus).
Zoom
The most popular and overused function on a camera. Why? Probably because it is easy to do. The effect is that it moves the point of view closer to, or further away from the object.
Tip: The more you have zoomed in to an object, the more difficult it becomes to keep the picture steady. If you know you are going to use lots of zoom, be sure to use a tripod.
Video Camera Focus
On more advanced cameras the focus function will be in the form of a focus ring on the front of the lens. You turn the ring to bring your chosen object into focus. The best way to focus on an object is to zoom right in to the object you want to be in focus, bring it in to focus and then zoom out to the distance needed. Focusing isn’t as easy as it looks and you should practice.
Tip: Auto-focus should be avoided for professional shoots as the camera doesn’t know what you want to focus on and you will find the camera shifting in/out of focus on different objects.
Iris/aperture
The iris/aperture refers to the opening which allows light to come into the lens – in other words, the ‘exposure’. This function is adjustable which means that you can control how much light comes into the camera. On professional cameras the iris ring is found on the lens housing. Digital cameras allow you to adjust the aperture digitally – i.e. by looking at the numbers. The aperture is displayed in terms of an ‘f’ number.
Tip: remember that the lower your apeture (F number) the bigger your opening (and the more light you are allowing in). The higher your aperture, the smaller your opening (and you will be allowing less light in).
ND Filter
Many cameras have built in neutral density (ND) filters. You can also buy external ND filters that screw on to your lens. These operate to reduce the amount of light that is able to pass through the lens which is particularly useful in very brightly lit situations.
Tip: If you are outdoors and it is bright but you don’t want to push your aperture up too high because you have your focus & depth of field just right, use the ND filter.
White balance
This allows you to tell your camera what each colour should truly look like in different lighting conditions – by setting the camera to what is really ‘white’ in a particular set-up. This function works automatically on amateur cameras but there are situations when auto won’t be sufficient and it is best to be in control. It will vary slightly from camera to camera but you generally set the white balance by zooming in on and filling the frame with a white object/surface. Then you press the white balance button and you will be notified when the balance is set. You will often also be able to see a shift in the colour.
Tip: Carry a piece of white paper or card in your camera bag at all times! Also, don’t forget to re-do your white balance if you are moving from indoors to outdoors. White balance can be adjusted in post-production but it is best to set it while shooting.
Video camera shutter speed
Shutter speed is one of those old film terms that have filtered through from the days of using film – there is no actual mechanical shutter on digital video camera. The equivalent function refers to how often information is pulled from your camera chip. So if your shutter speed is set to 60, information will be taken from your chip every sixtieth of a second. The greater your shutter speed, the more detail you will get. There are situations when more detail might not be the effect you want. Lower shutter speeds will allow more light in to your camera.
Tip: If you set your shutter speed any lower than 60, you will get a blurred image because the camera isn’t collecting enough information to fill in the gaps. So don’t do it, unless you are looking for a ghostly effect.
Zebra
A less significant function as it isn’t a control in itself, but what it does do is show you where your shot is over exposed so that you know when to let less light in to the camera.
Tip: If your camera has the zebra function, use it! If shots are too dark it is possible to recover some quality in post-production. This is impossible if the shot is too bright.
A fun technique to play with: focus pulling